The stock adjustment event type enables you to remove inventory in order to correct your stock levels. Maybe you recently had an inventory audit or cycle count or maybe inventory was created in error. Well this method will let you make a perpetual record of this inventory adjustment and record the reason why the inventory was removed.
Recent Updates:
- Facility stock may now be added to Stock Adjustments in order to correct inaccuracies in Facility Stock inventory.
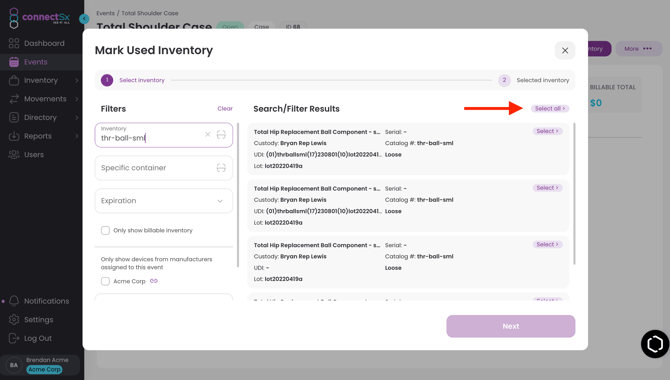
- Sometimes when you’re doing a stock adjustment you may be clearing out a whole lot due to expiration, for instance. Well now when you’re selecting inventory you can “Select All” to add to your Event. We hope that this expedites adding inventory when you’re trying to select a large batch.
To create your Stock Adjustment:
-
Create an Event with the Event type of “Stock Adjustment”
-
Enter a name for the event. We recommend making the name refer to the reason for the adjustment to make it easy to identify and provide detail to future users referencing the event.
-
Select a date for the event.
-
Click Next
-
Enter any associated containers if applicable.
-
Click Create
-
Next you’ll be brought to the typical Event detail screen.

-
Next, make any comments that may need to be added to provide context for the inventory adjustment.
-
Then navigate to the “Mark Used Inventory” tab to select the inventory you’d like to deactivate.
-
Search for the inventory you need and select it by clicking on the plus buttons next to each item.
-2.webp?width=670&height=374&name=image%20(29)-2.webp)
-
Modify the quantities you are deactivating of each selection.
-
Then Click “Mark Devices”
-
Move to the “Devices Used” tab
-
Check the inventory details and make any adjustments needed.
- The default inventory status for Stock Adjustments is 'Duplicate'. However, you may modify this to: Missing, Expired, or Damaged/Waste.
-
Then click “Complete”.
-2.webp?width=670&height=374&name=image%20(30)-2.webp)
-
Then click “Continue” and the adjustment will be processed. This ends the workflow.
-1.webp?width=670&height=374&name=image%20(31)-1.webp)