Beacon offers a few options for accessing reports and exporting this data. This article describes how to export data from the Reports section of the system. Note that certain reports may not be available to every user depending on their Role.
The steps below describe how to use the Reports section, but don't forget to check out the Beacon Intelligence Dashboards too!
- Navigate to the Reports Screen
- Open the desired report
- Apply any filters you would like in the sidebar
- Click Refresh on the report table to apply filters

- Click on the vertical ellipse or Kabob menu that appears when you hover over the upper right corner (Tile Actions)

- Select Download Data
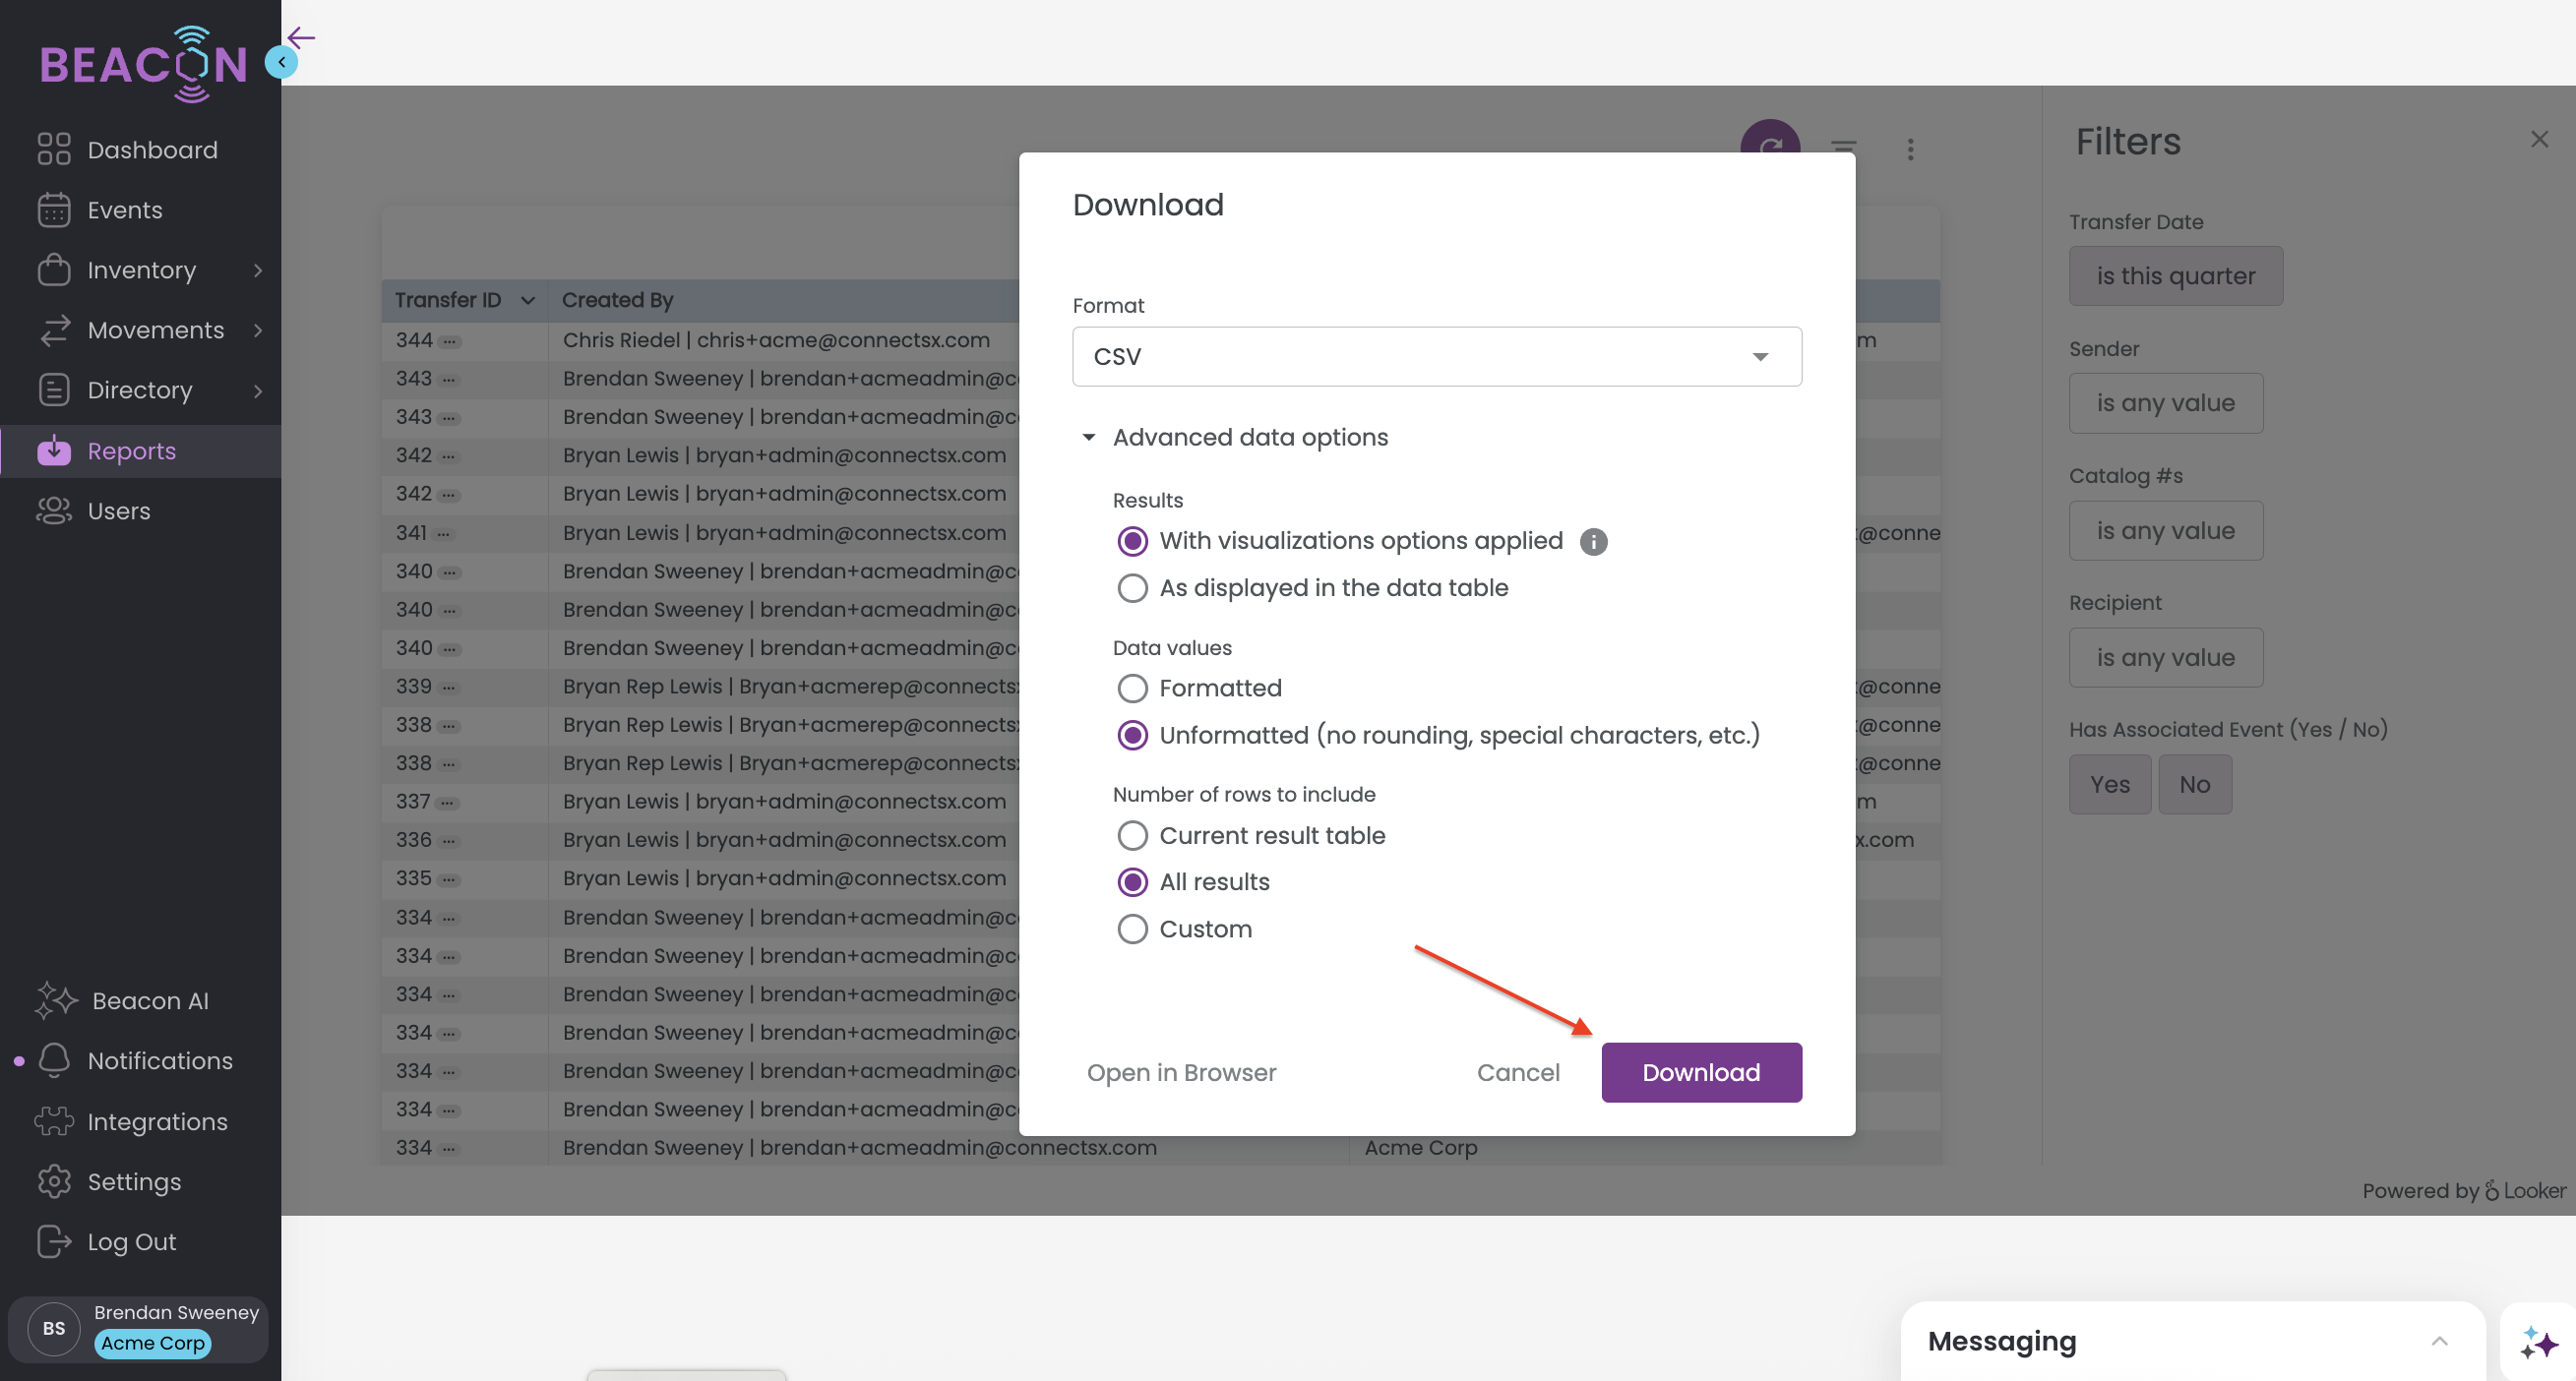
- Choose your File Type
- Change your download settings. The most common download for a .CSV or Excel file should use the following settings. It is critical to use these settings to ensure all of the data is able to export.
- In Results, select "With visualization options applied"
- In Data Values, select "Unformatted (no rounding, special characters, etc.)
- In Number of Rows to Include, select "All Results"
- This is very important as your data set may extend farther than Looker is able to display visually in Beacon, but you want to make sure to export all data.
- Click Download