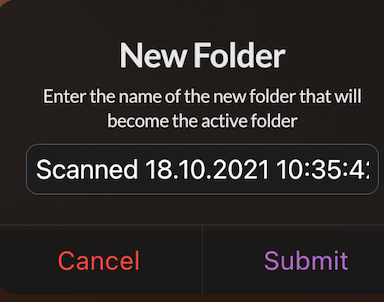
You may want to create a folder for your scanned devices to easily identify your scans at a later date or to make them easier to export. When a folder is created it will segment those items in your history. Just click the “+” above your keyboard to create a new

-
You may name your folder based off of any criteria you wish, but some examples might be:
-
Items scanned on a particular date (The title defaults to the date/time stamp)
-
Items scanned in a particular surgery
-
Items scanned from a particular warehouse bin or location
-
-
Once you’ve created a folder it will become your “Active Group”. You may then start scanning devices and they will be associated with this folder.

-
Next go to your history and you can view your scanned items by folder.
-
You may choose to export just a particular folder of scans rather than exporting your entire scan history. Click on the vertical ellipsis next to that folder to see your options, and select “Export”.
-
You may also edit the Folder Name by clicking on the vertical ellipsis next to that group and selecting “Edit”.
-
When a new folder is created, your previous group will be moved to inactive, but will still be stored in your history.
-
To add more devices to a non-active folder, click on the vertical ellipsis next to the group in the history and select “Move to Active”. Then you may add more scans to that group.
