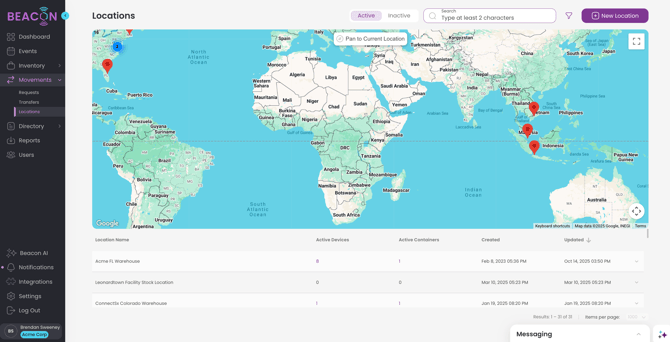
*New* Try out the brand new location screen, featuring a split map screen to visualize your custom locations while you manage them!
You can now create custom locations to add to your inventory. This feature allows you to track inventory to its physical location, not just by Custodian.
Update Note: You can now assign locations to each user individually so that they'll only see the locations that are pertinent to them, and they won't have to sort through all of the other locations when they are selecting one. This also helps you to add a layer of privacy two locations that you don't want to be public. For more information check out this article.
Searching Locations with Inventory Data
To expand the value of the ConnectSx location functionality, we allow you to search your locations by Catalog #, Lot #, or Container. In the Locations screen, just search a piece of the valid device information to pull up locations where that inventory is stored!
Note: Regardless of the location, All inventory must always have a custodian (even if it’s the Organization), not all inventory must have a location. Custody of inventory must be transferred to the user account that will use it in order for the inventory to be sold or consumed in the system.
Creating Custom Locations
-
First Navigate to the Locations Screen
2. Click the “Create New” button in the upper right corner.
3. Enter the name of your location - this is how the location will appear in the Inventory Detail page and search.
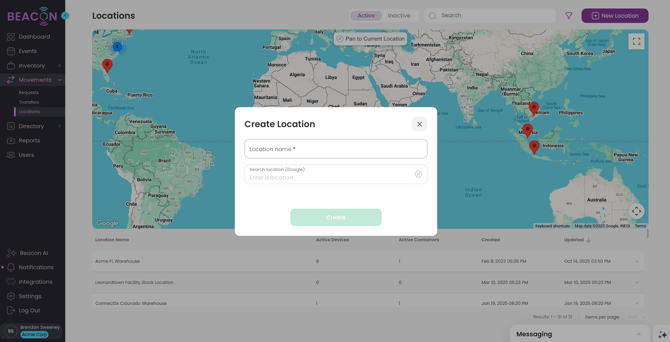
4. Then search for the physical location using the Google location search - this ties the location geographically to where the inventory will reside.
5. Then click “Create” and the location will be added.
Applying a Location to a Device or Container
When inventory is being stored outside of a user’s possession, but not out of their custody it can be useful to apply a location to that inventory to keep track of where it physically is. The following steps will show you how to apply a Custom Location to a piece of inventory:
-
Navigate to the Inventory screen and search for your device or container.
-
Click on it to open up the detail screen.
-
Scroll down to the Location field.
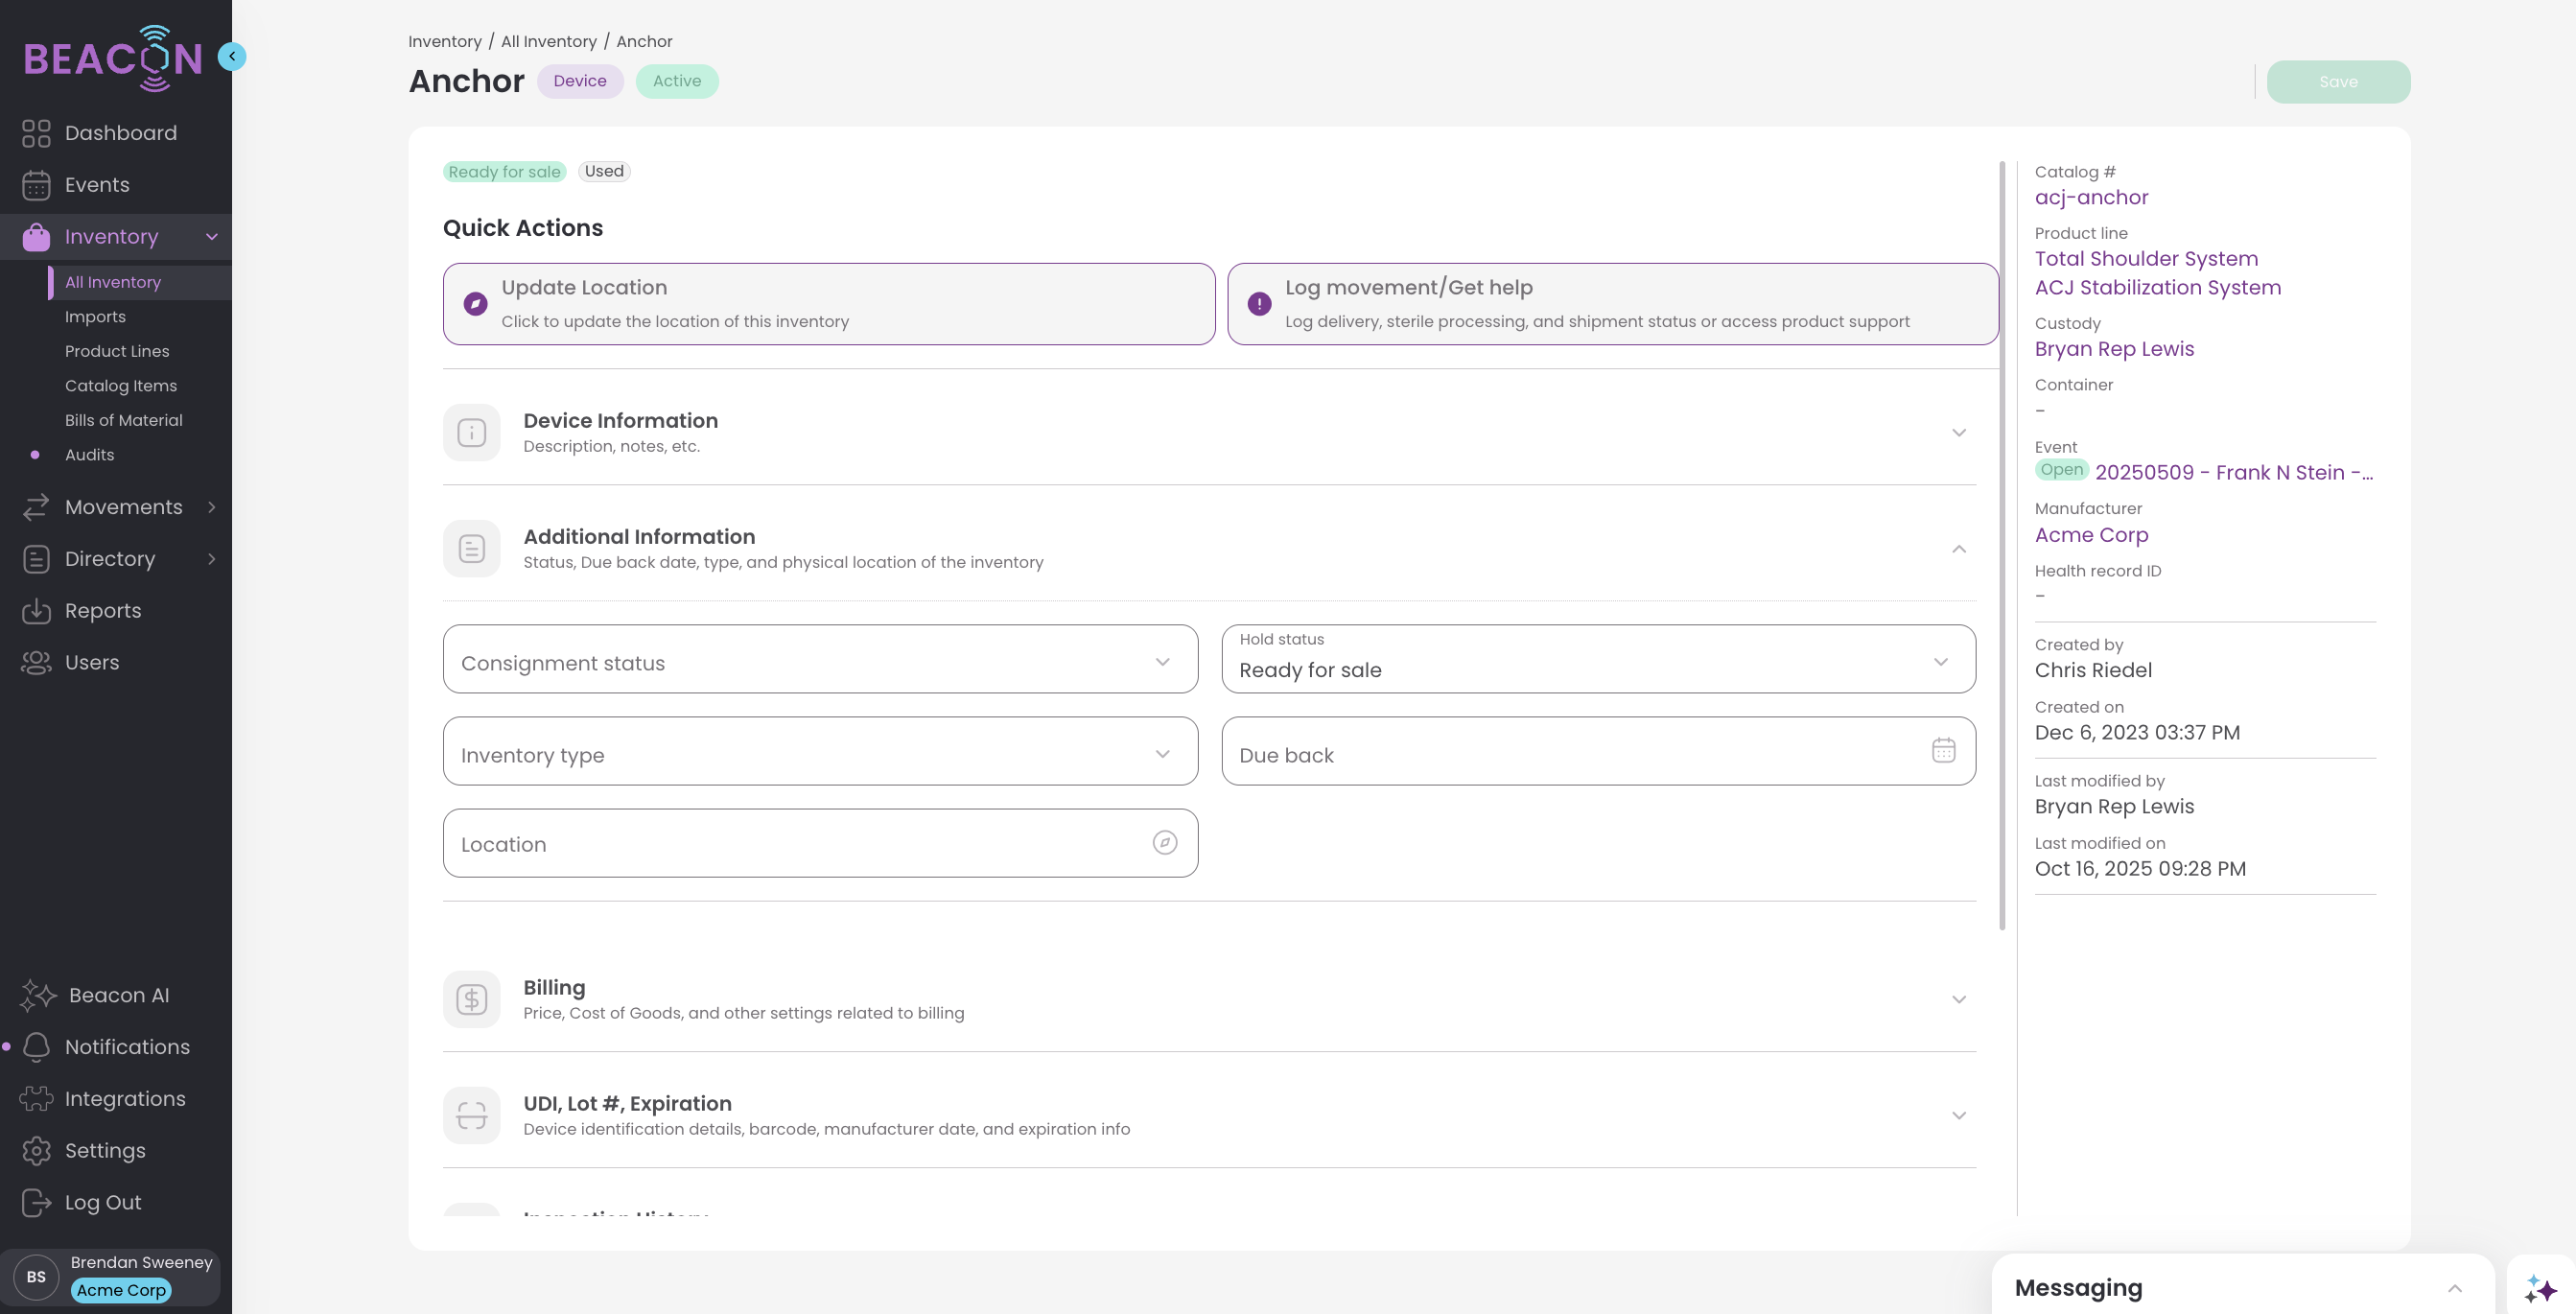
4. Next, click into the Location field with your cursor to bring up the drop down menu. Then select your location.
.png?width=670&height=404&name=image%20(20).png)
Alternatively, you can click on the compass symbol in the Location field to easily look up locations near your current location using GPS. 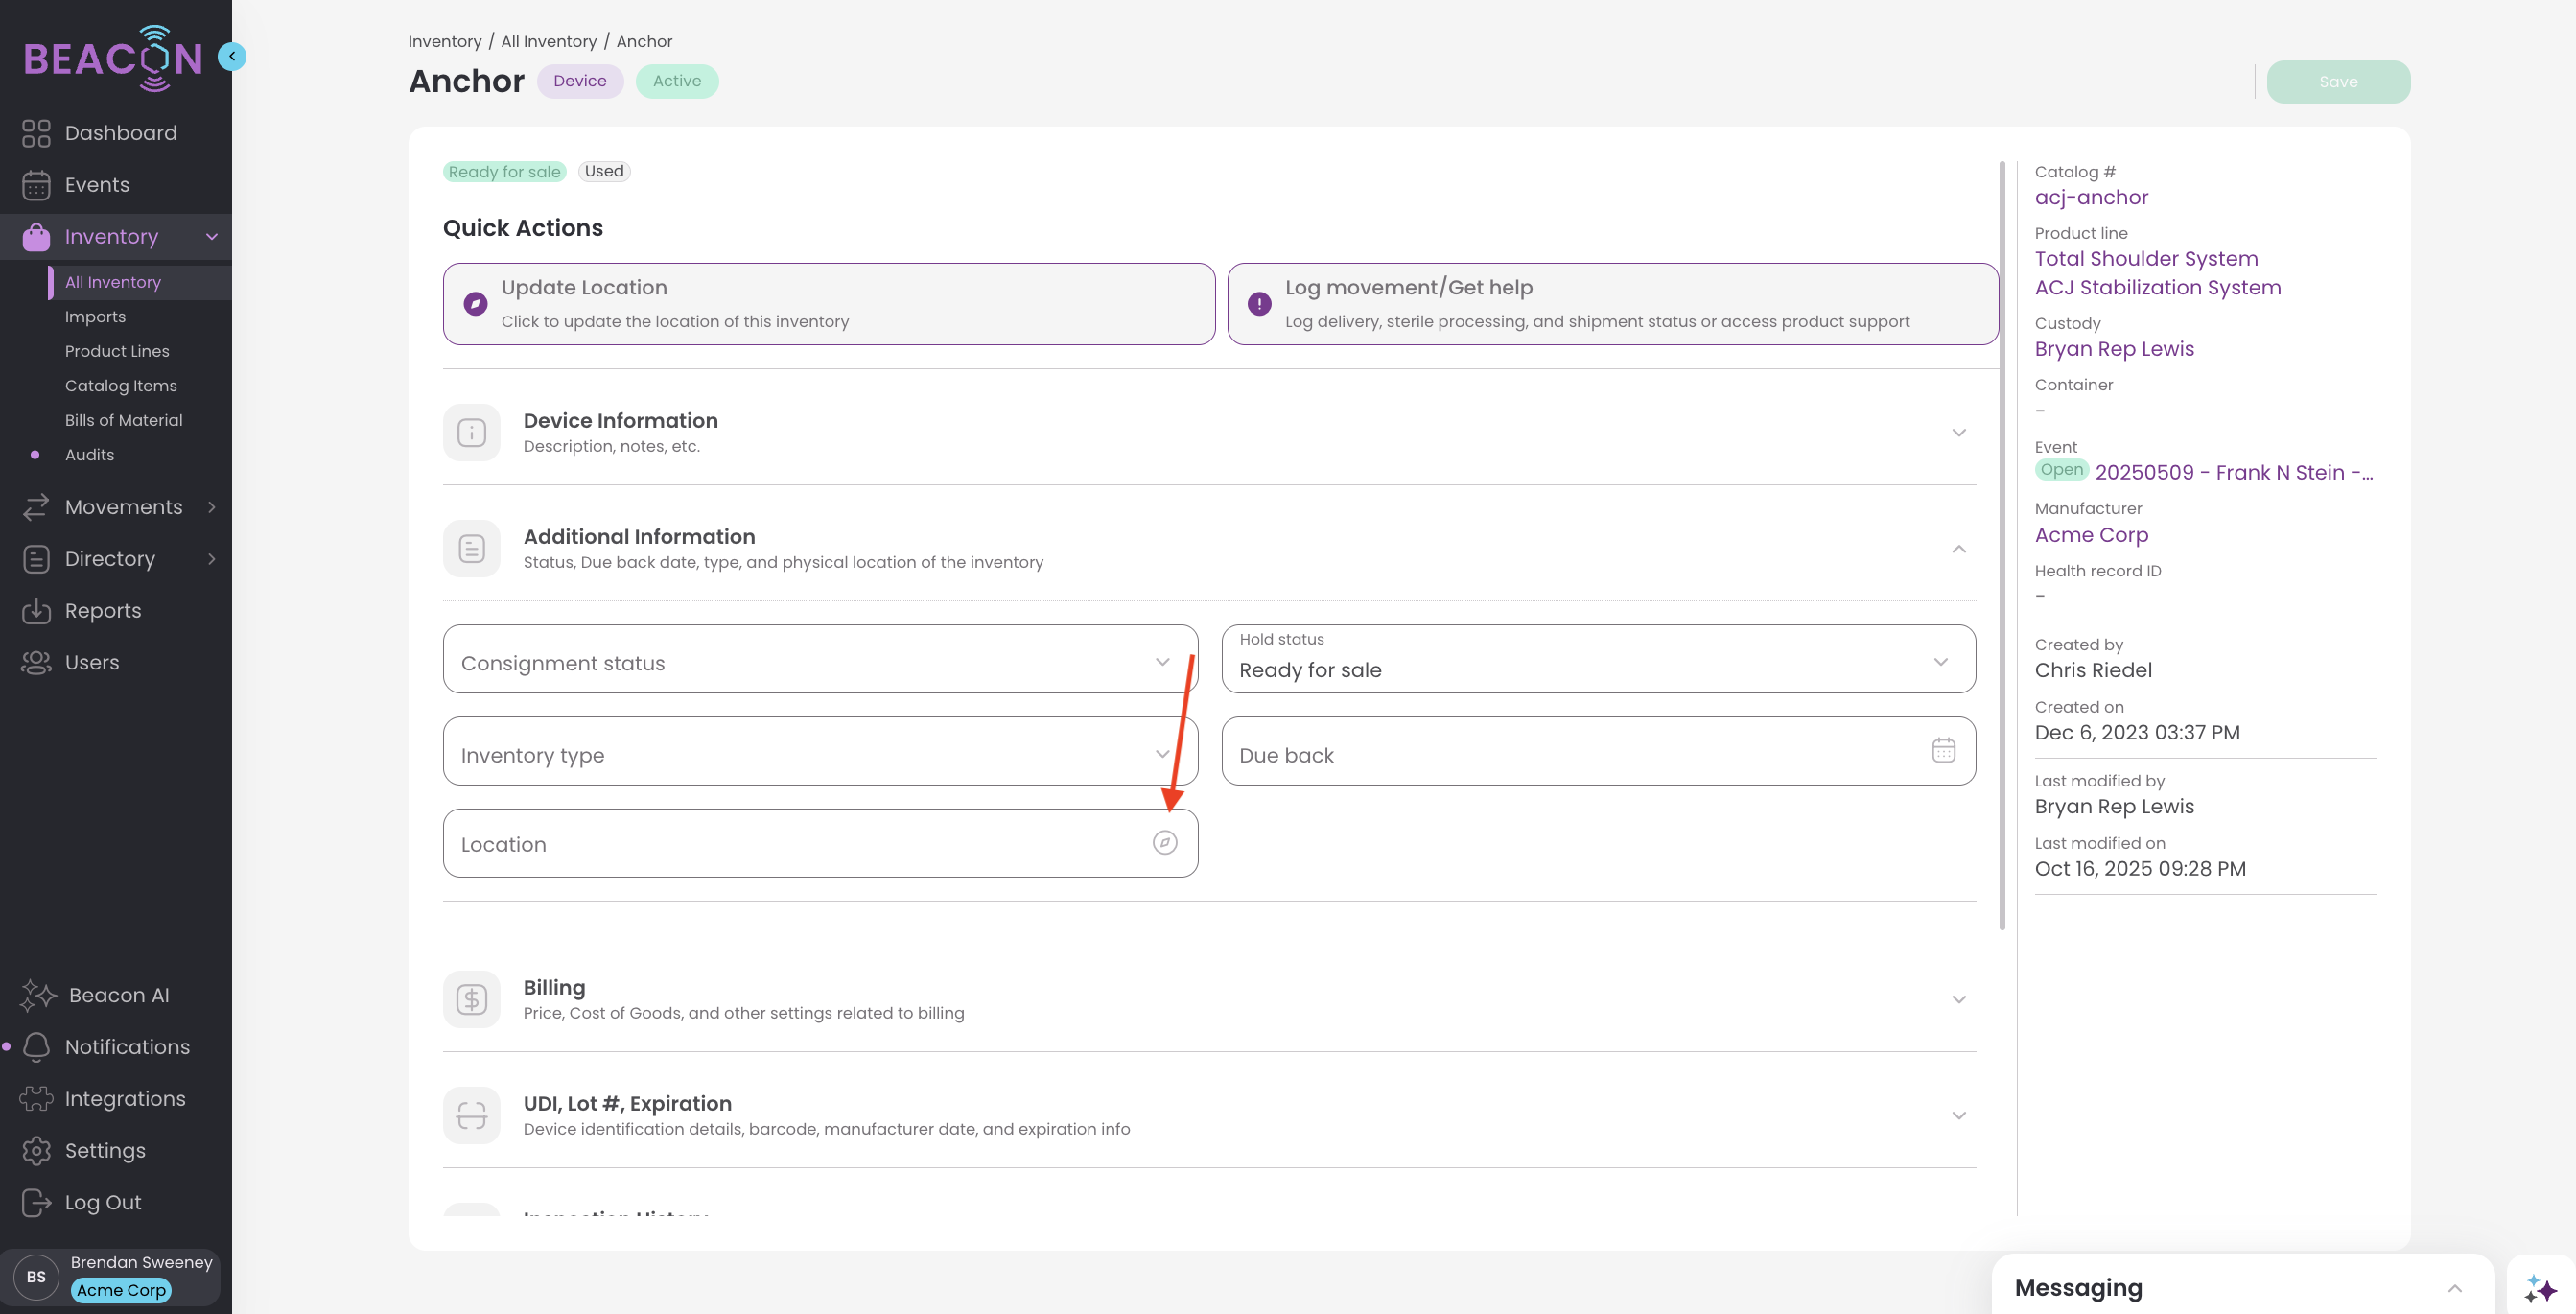
5. If necessary, you may also click “View All” to navigate to the Locations screen and view all locations; or click on the “+ Add New” button to add a new location without navigating away from the screen. (see instructions above).
.png?width=670&height=404&name=image%20(21).png)
Return to the Locations page to see where your inventory is:
You can easily see on the Locations page how much inventory is in each location.
.png?width=670&height=404&name=image%20(22).png)
Switch to the Map View to drill down into your inventory and see where your inventory is geographically.
.png?width=670&height=404&name=image%20(23).png)
You can also filter your inventory by location in the All Inventory Page
.png?width=670&height=404&name=image%20(24).png)
Deactivate a Location
To deactivate a location, locate that location in the Locations screen, and click on it to open it. In its detail screen click on the deactivate button in the upper right hand corner.