Receiving/Accepting a Transfer
TL;DR: Accept the Transfer
If you just need to know how to accept the transfer, click on the green checkmark anywhere you see the transfer, including:
- The transfer detail screen
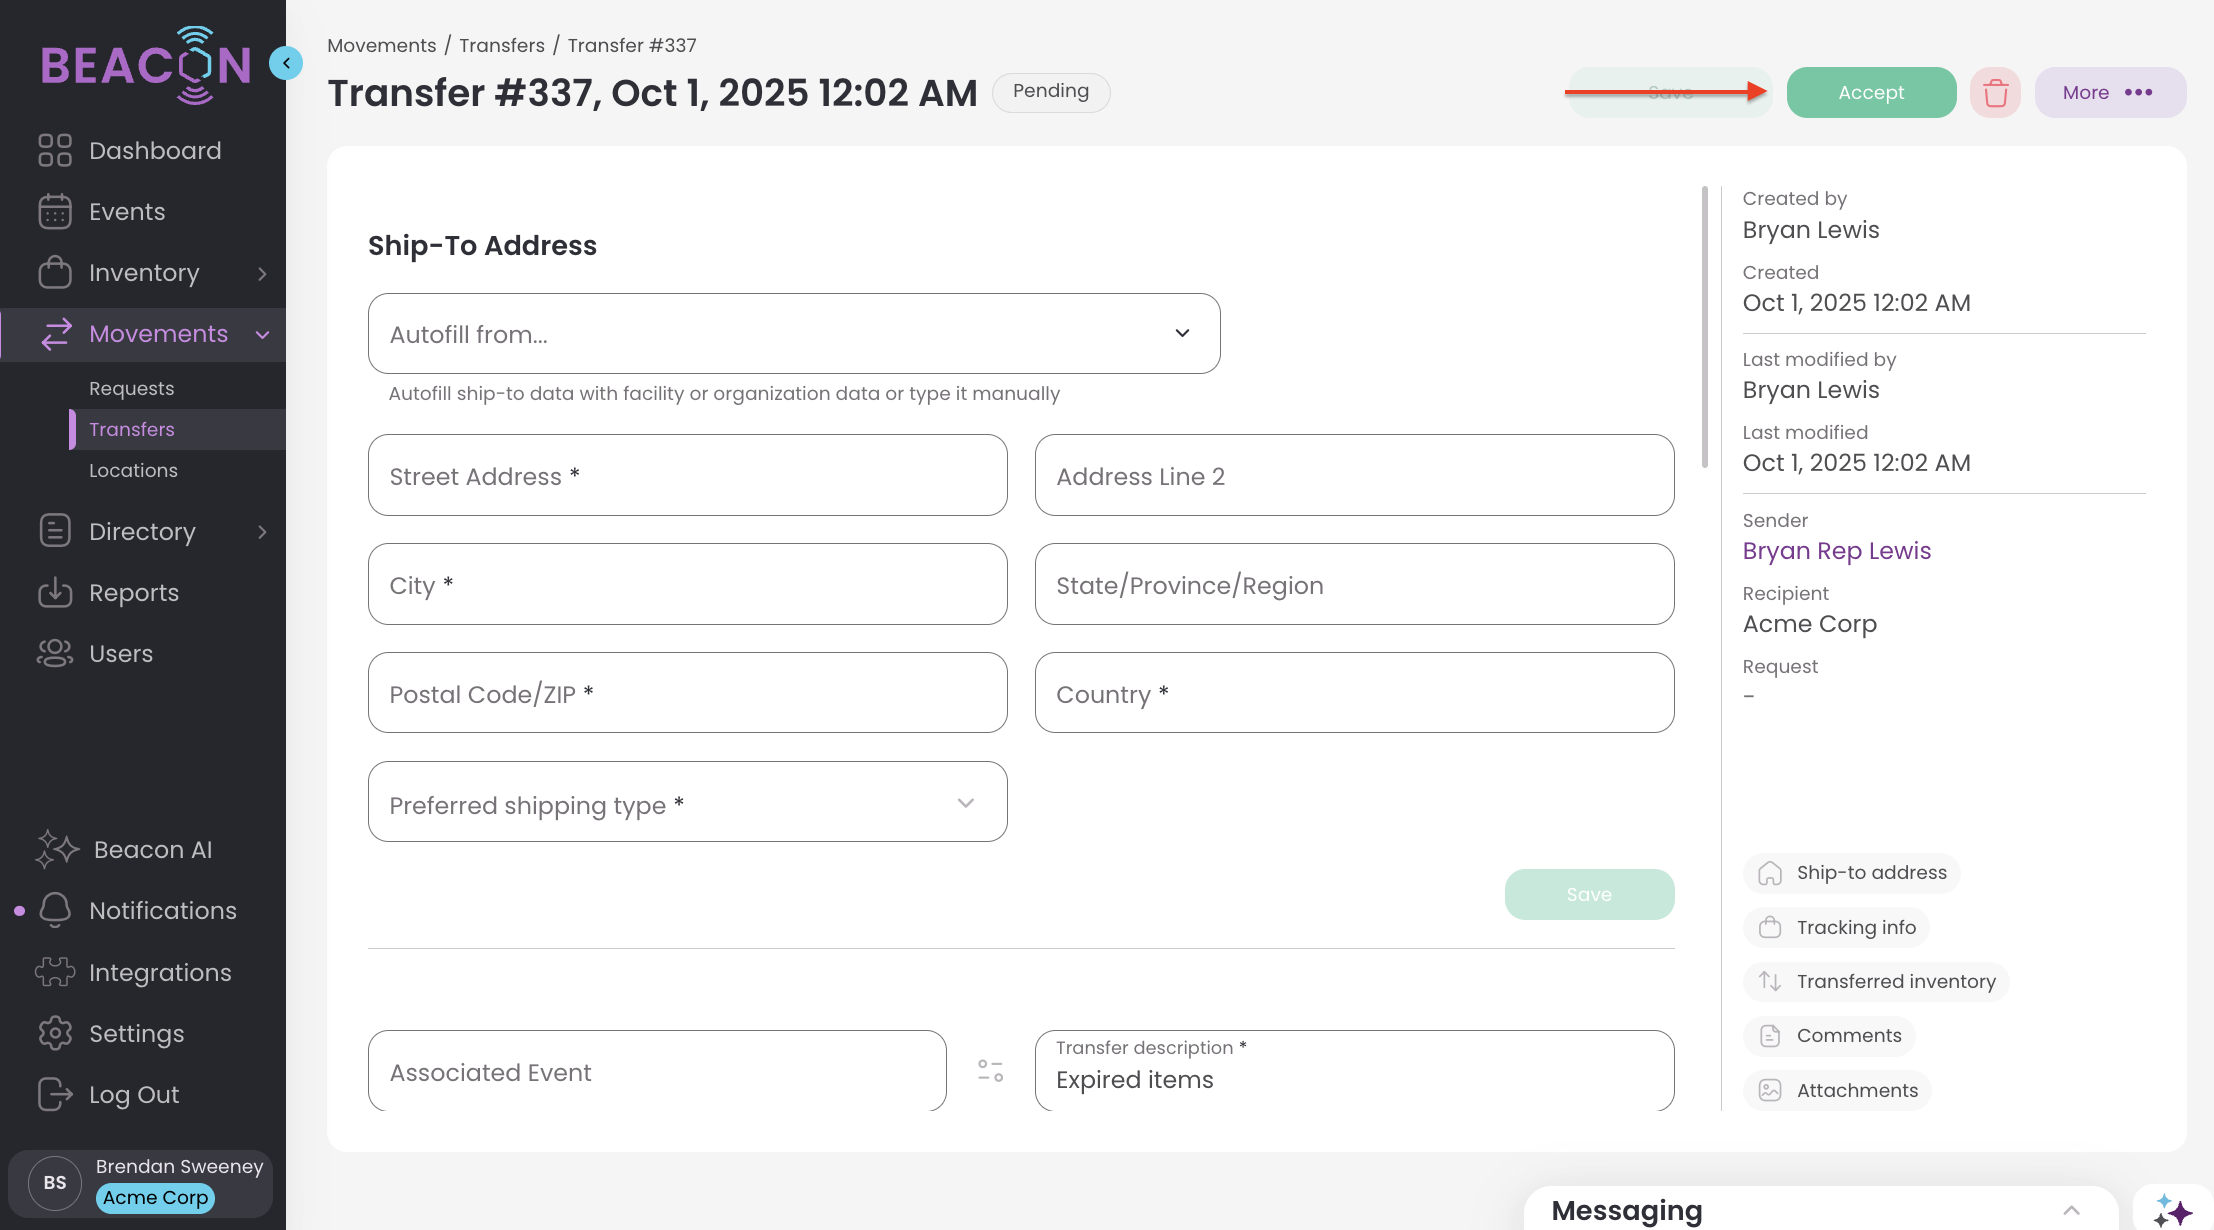
- Transfer Screen
Background
In ConnectSx, inventory is moved from Custodian to Custodian via inventory transfers.
- One user creates a transfer in order to move inventory out of their stock, or their custody, into another users' or the organization’s stock, or custody when they accept it.
- After a transfer is initiated, a Pending Transfer appears in the recipient’s account and they are notified that they have incoming transfers to review.
- The recipient must then review the transfer and determine whether to Accept or Decline the transfer.
- Accepting a pending transfer will move the inventory into that user’s custody.
- Declining a pending transfer will bounce the inventory back to the original custodian with a “HOLD” status for the manufacturer to review and confirm before the inventory is returned to the original custodian’s stock.
Transfers by Roles
Typically transfers are created by the person sending the inventory and are accepted by the custodian user receiving the inventory, however there are some exceptions:
-
Admin Users may
-
Initiate transfers between any users
-
Accept or decline transfers for any users
-
Admin Users may accept or decline a transfer on behalf of the recipient. If an Admin declines the transfer the transfer status immediately changed to Declined (bypassing the HOLD staus).
-
If a transfer is declined an email and an in-app notification will be sent to the Sender of the transfer.
-
-
-
Regional Managers
-
May initiate transfers between any users assigned to their region
-
May accept or decline transfers for any users assigned to their region
-
-
Distributor Users
-
May initiate transfers on behalf of themselves and any sales users assigned to them
-
May accept or decline transfers for any users assigned to them as well as themselves
-
-
Sales Users
-
May only initiate transfers or accept/decline transfers on their own behalf
-
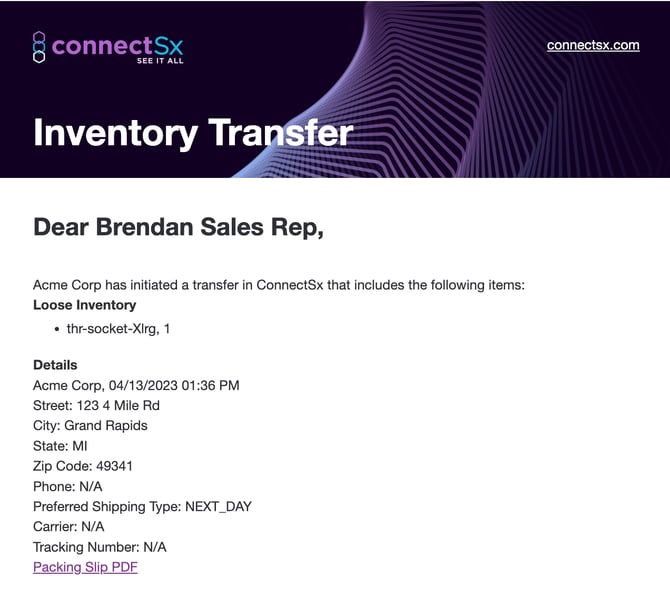
Transfer Email Notification for Recipient
When a transfer is created, the recipient will receive an email notification with a link to the packing slip, an in-app notification, and depending on their settings a mobile push notification.
Transfer Declined email notification for the Sender
When a transfer is declined an email notification will be sent to the sender.
How to receive a transfer
-
On the Dashboard view your pending transfers, and click on one for a shortcut to the transfer detail page where you may accept or decline them.

-
You may also locate pending transfers in the:
-
Notifications: You will receive a notification when you have a pending transfer
-
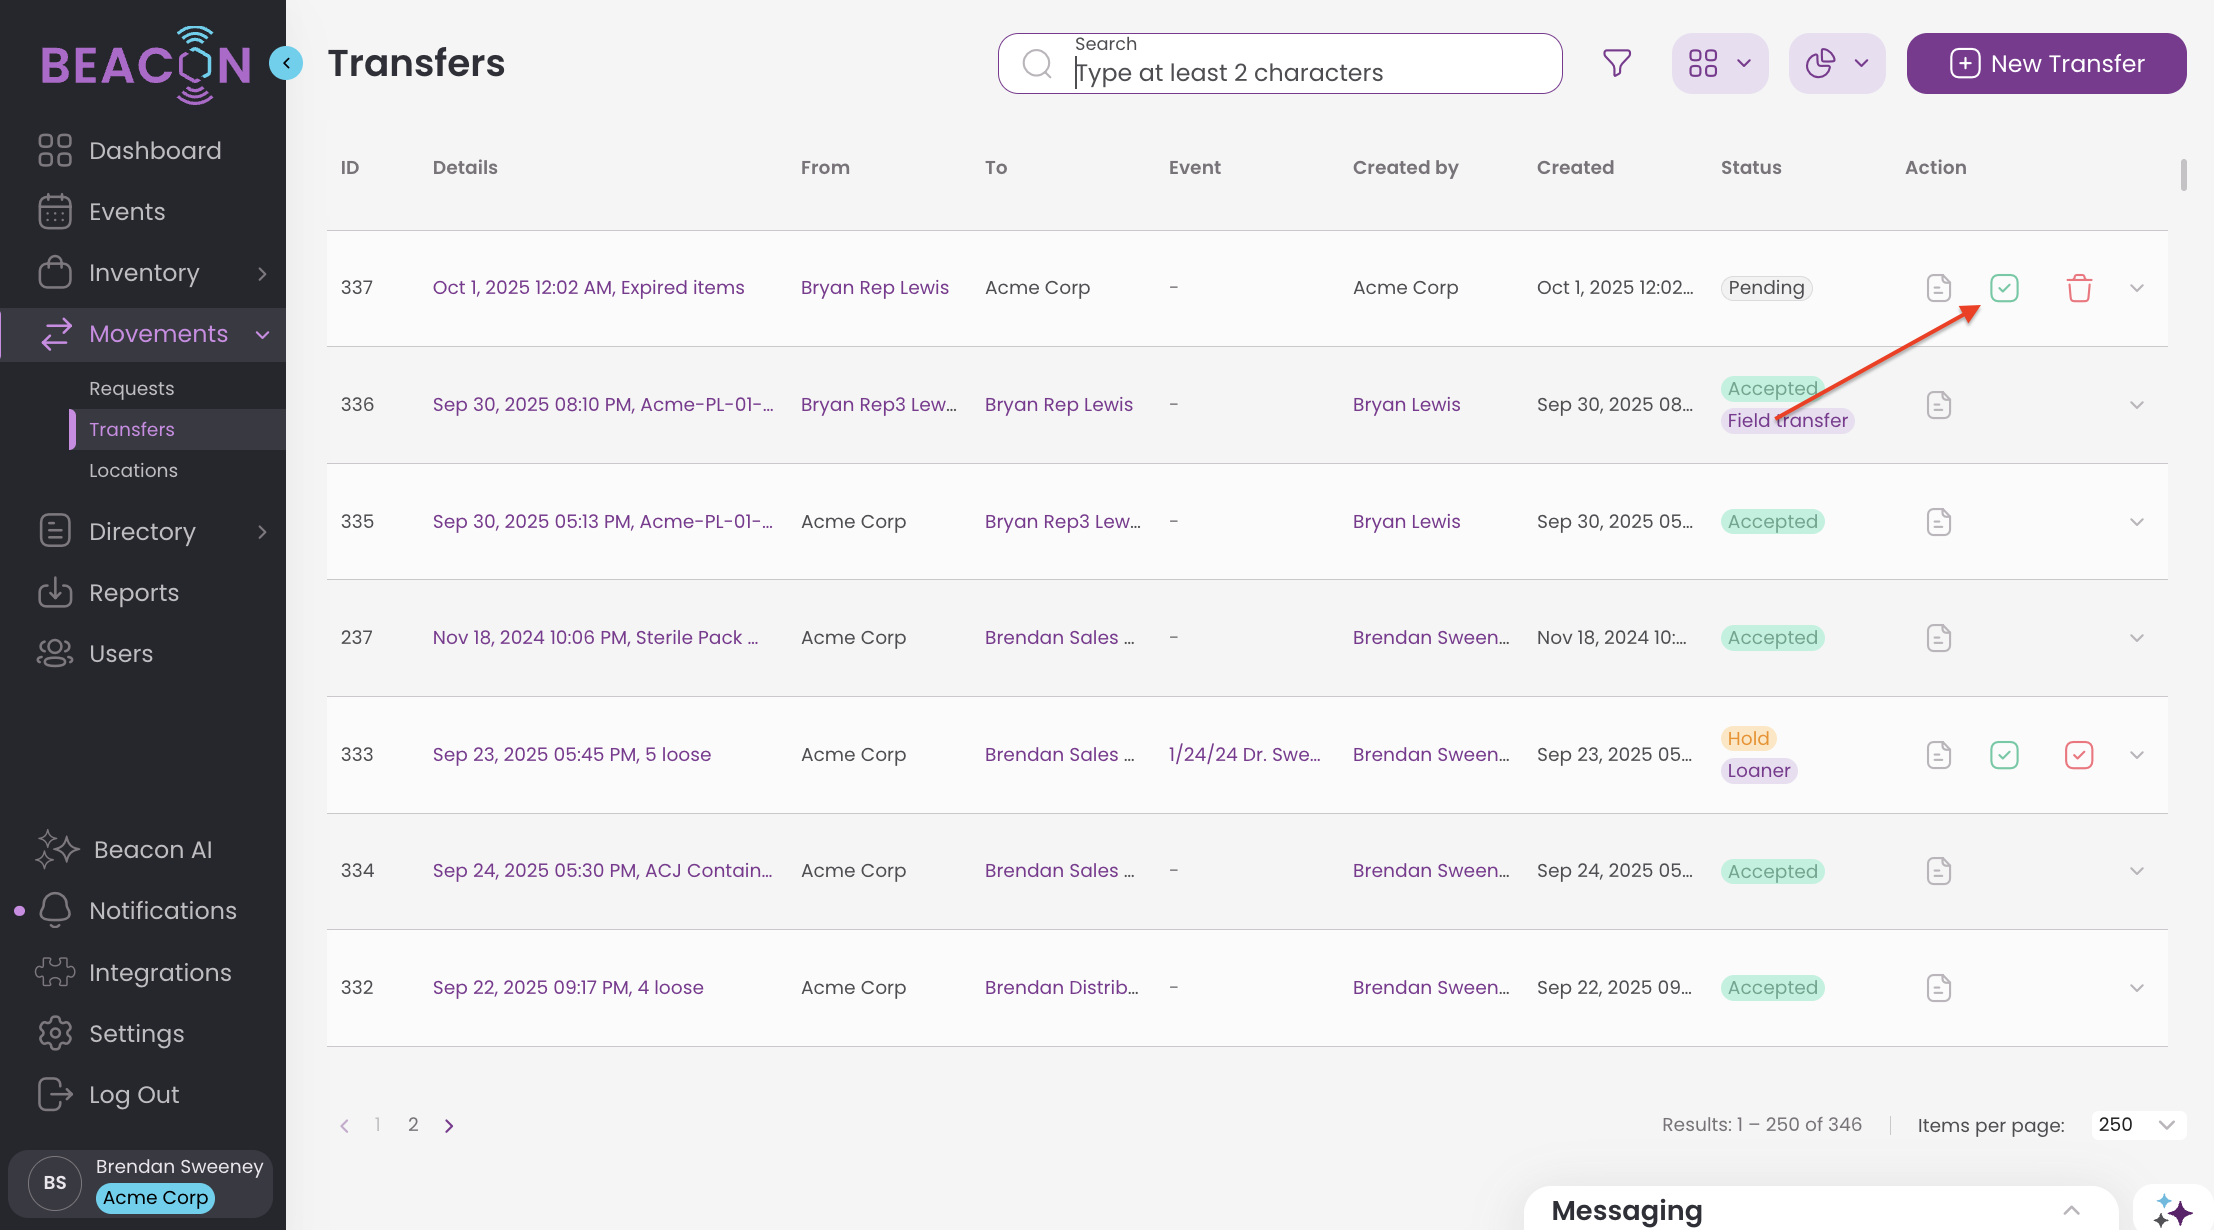
Transfers Screen
-
-
Click on a transfer to review its details
-
Click on the green check mark or “Accept” to accept the transfer. Click on the red trashcan icon to decline the transfer.
-
Declining Transfers: If you would like to decline the transfer, click “Decline” in the “Actions” column. You will then be prompted to provide a reason for declining the transfer.
-
Admin Users may accept or decline a transfer on behalf of the recipient. If an Admin declines the transfer the transfer status immediately changed to Declined (bypassing the HOLD staus).
-
If a transfer is declined an email and an in-app notification will be sent to the Sender of the transfer.
-

