December 2025 Updates:
Transfers will now allow users to transfer expired custody back to the organization once they confirm the action, also allowing them to automatically create a replenishment request for those items. 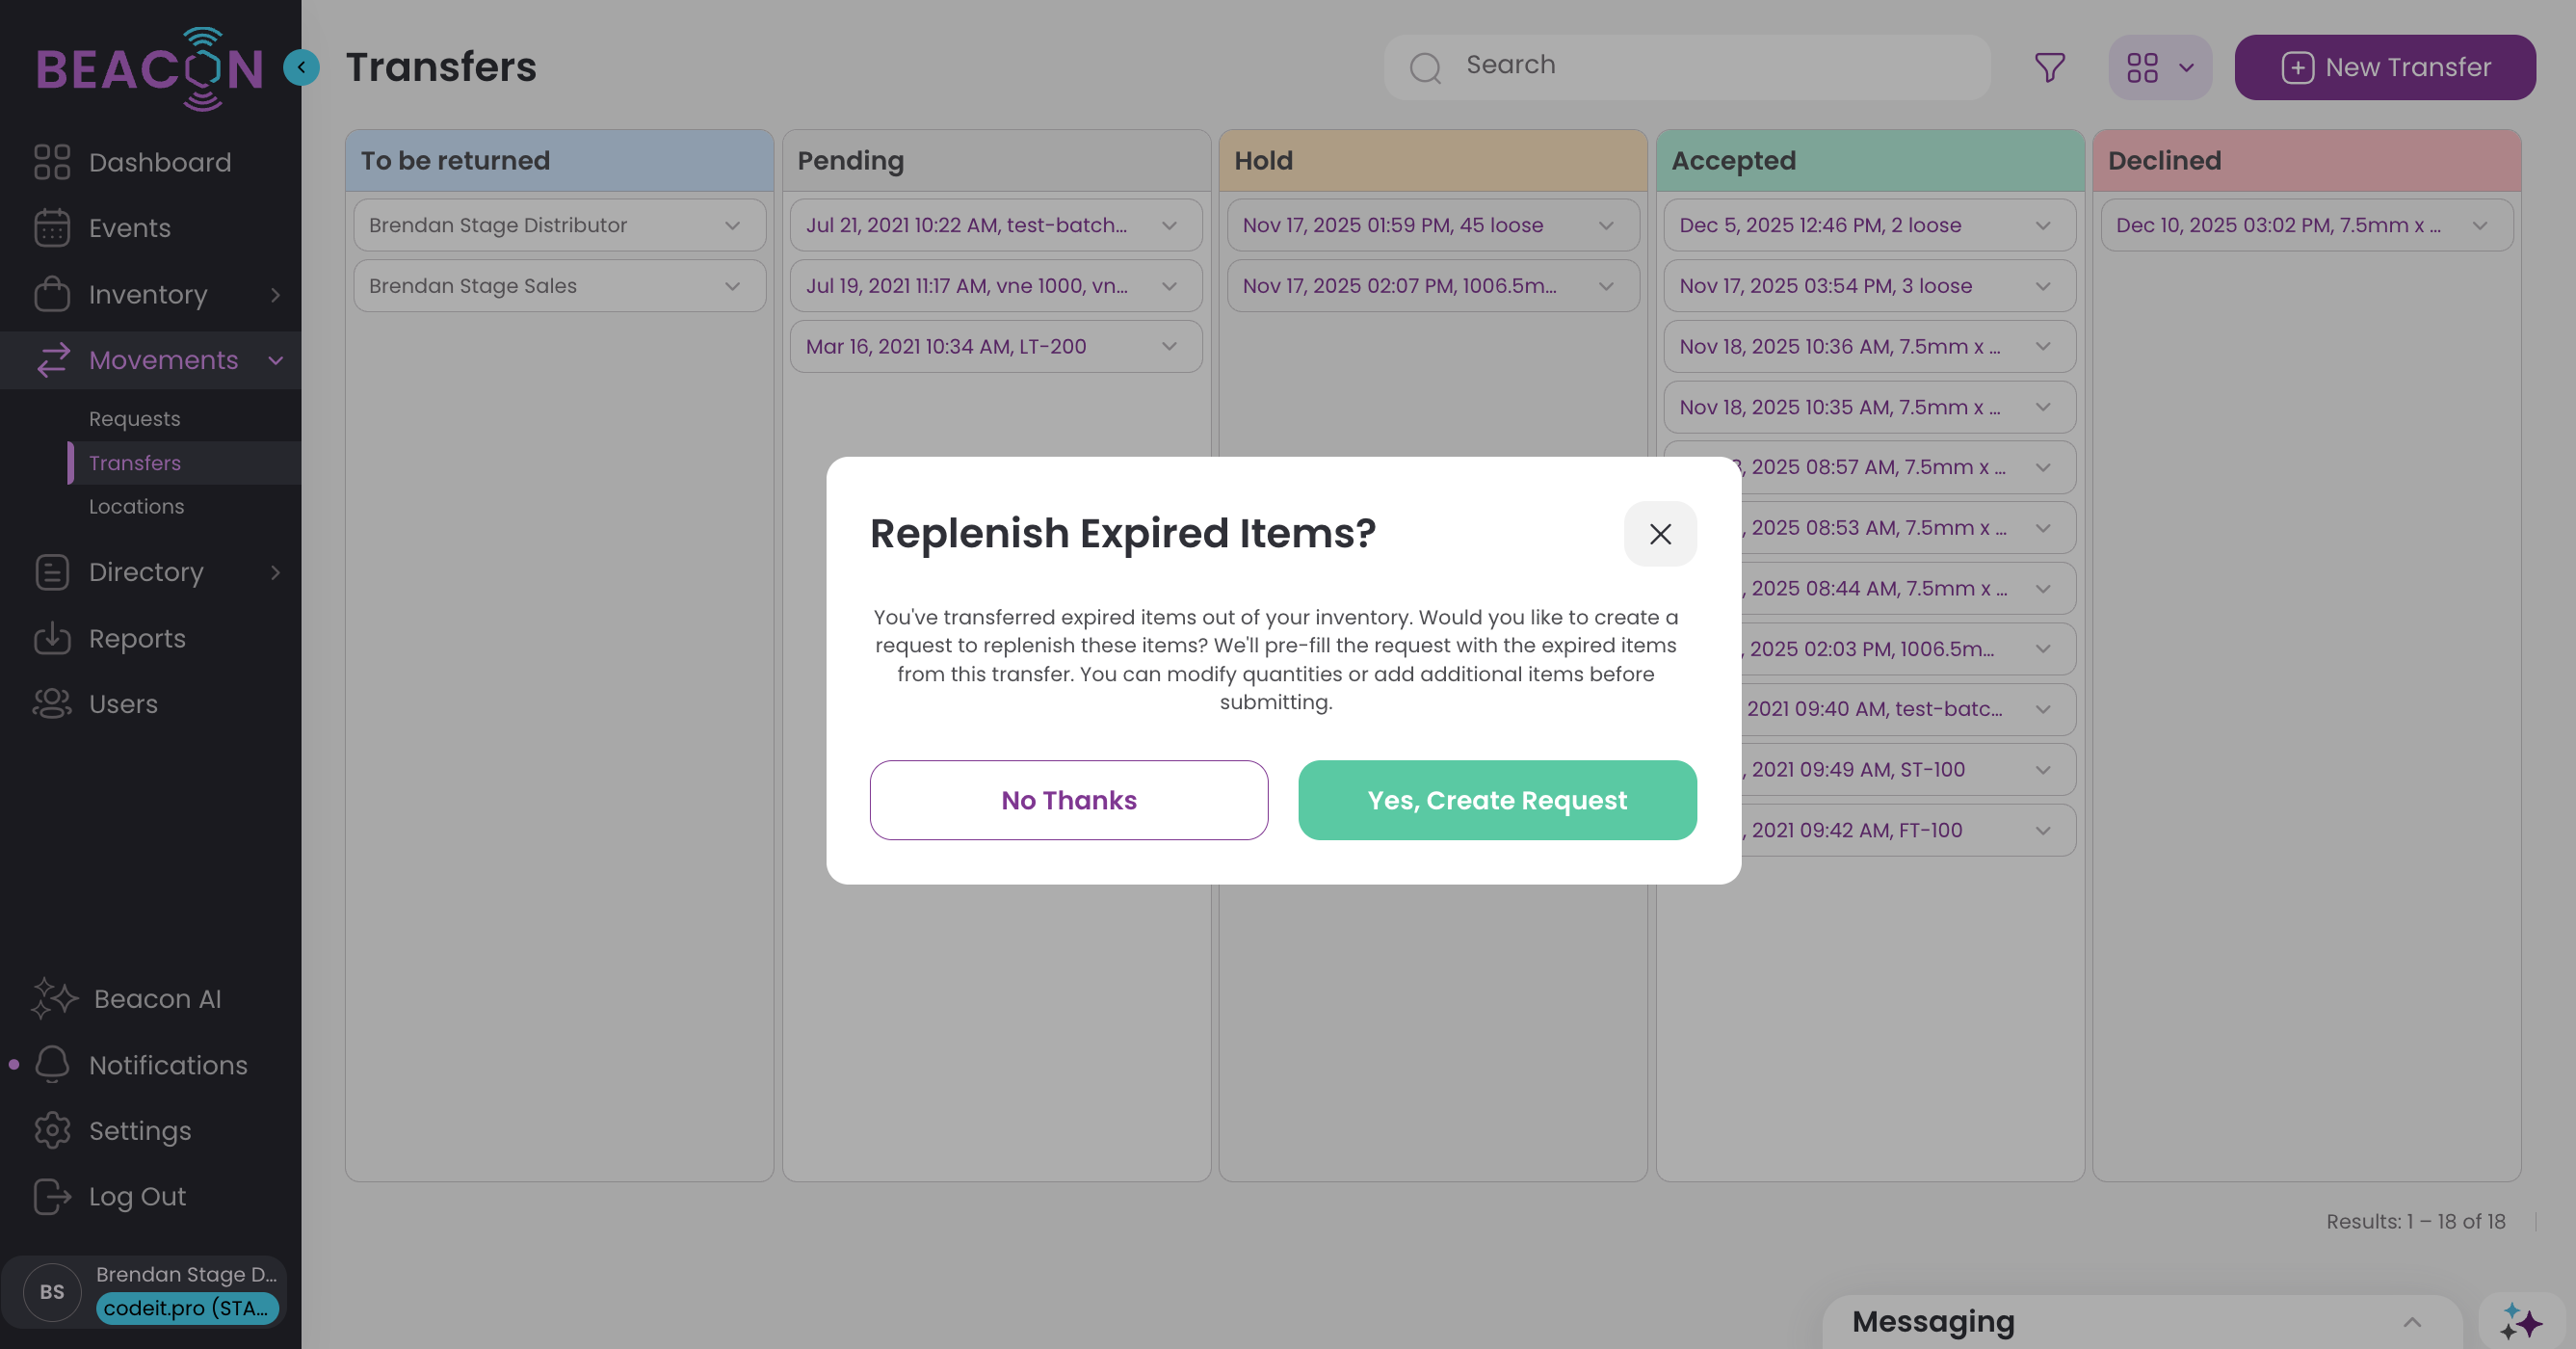
The transfer detail page now displays individual item lot numbers for easy reference. 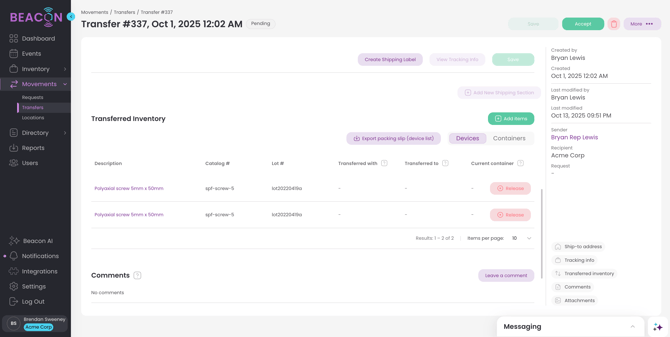
- Inventory transfers are the primary mode of inventory movement in ConnectSx.
- As all inventory must have a custodian, a transfer is how inventory is moved from one custodian to another.
- Admin’s may not be custodians, but rather manage the inventory of the Organization.
- Regional Managers may not be custodians, but may interact with the inventory of the users linked to their region.
Search and Filter your Transfers
Accepting/Declining a Transfer
Creating a Transfer
-
You may initiate a transfer from either:
-
The device or container’s detail screen. This is accessed by clicking on the device or container in the "All Inventory" screen, then clicking “initiate transfer” in the transfer section at the bottom of the device detail screen (This will also add the item or container to the transfer).

-
Or, by accessing the Transfers page (in the inventory secondary navigation bar), by clicking the “Create New Transfer” button that is located in the upper right hand corner.

-
-
First, select the type of user who will be sending the inventory from the dropdown menu, and then select the actual user (the person initiating the inventory transfer).
- If you are a sales user, your account will automatically be selected.
.png?width=670&height=373&name=image%20(1).png)
- If you are a sales user, your account will automatically be selected.
-
Next step is to select the type of account you are transferring to in the first grey box using the available drop down menu (Organization, Distributor, or Sales).
-
Sales users may now transfer inventory to other Sales users! And Distributors may transfer inventory to other Distributors within an organization

-
- Next select the Current Custodian of the inventory and the intended Recipient from the drop down menus in the next two boxes.
- Then search for the inventory you are transferring from the available inventory box using the filters along the left side of the pop-up window. Add them to the transfer by clicking on the "Select" button next to each device. Add all items you wish to transfer.
-
Use the Scan to Add feature to scan the UDI barcodes on your inventory to easily add them. 1 scan = 1 device added to the transfer (as long as it is available in the sender’s custody).
-1.png?width=670&height=393&name=image%20(1)-1.png)
-
Note that you can see how far away each item is from expiration while you're selecting it.
.png?width=670&height=393&name=image%20(2).png)
-
- You’ll see your selected inventory in the “Selected” tab of the pop-up window. You may use the “+” and “-“ buttons to add more inventory with the same Catalog # and Lot # to the transfer (The number behind the slash denotes how many are in your inventory).

- Click
- Enter a Description for your transfer, if you do not a Description will be automatically created using the transfer information.
.png?width=670&height=370&name=image%20(4).png)
- If an Item was added in error, it can be removed by clicking the red “X” next to the item.
.png?width=670&height=417&name=image%20(5).png)
- Next, you may set a location for the inventory that you’re transferring. Just check the “Reset Location” toggle and select your location from the drop down menu.
.png?width=670&height=417&name=image%20(6).png)
- Next, scroll to the bottom of the page and add your transfer notes.
.png?width=670&height=417&name=image%20(7).png)
- Make any updates to the inventory such as adding Tags, Resetting the Location, updating the Hold status or Consignment status. These changes will be applied to all of the inventory on the transfer, a great way of making bulk updates in these areas.

- Reset the Due Back Date to label this inventory Loaner inventory, and update the consignment status to "Loaner". This Due Back Date will be applied to all items on the transfer. You and the Custodian of the inventory will receive notifications as the due back date approaches to make sure the loaner inventory is returned in time.

- Finally, click “Create” in the upper right corner to create the transfer.
.png?width=670&height=417&name=image%20(8).png)
After the Transfer is Created
Once you’ve created your transfer you have some new available options:
Transfer Email Notification: An email notification will be sent to the recipient with a link to the packing slip.
.png?width=670&height=598&name=image%20(9).png)
Review Transferred Inventory: You can easily reference what inventory is on a transfer or was transferred in the detail page, and even make modifications in some cases. 
Tracking Information: You can enter tracking information for your shipment. Select the carrier, enter the tracking number (barcode scanning available), and any shipping costs. Then Click “Save”.
.png?width=670&height=365&name=image%20(10).png)
Associate it with an Event
If you would like, you may associate this transfer with an existing event.
.png?width=670&height=356&name=image%20(11).png)
The associated event is now displayed in the Transfer list as well.
.png?width=670&height=364&name=image%20(12).png)
Return Authorization #
You can enter the RA#, if necessary.
.png?width=670&height=356&name=image%20(13).png)
Attach Files: You may attach PDF, RTF, or Image files to your transfer. You may either add a URL for the file, drag and drop the file onto the dotted line rectangles, or click inside the relevant dotted line rectangle to select a file from your computer. Make sure to save after every change!
.png?width=670&height=365&name=image%20(14).png)
Export Packing Slip: You may export a PDF packing slip of the transfer’s contents to use for your records, as a pick list, or to include in the shipment (for instance). Just click on the “Export Packing Slip” button and select “PDF” to download the document. You may use the tabs to filter between Devices and Containers and export a packing slip of that inventory type.
Search and Filter your Transfers
In the Movement → Transfers page you can search and filter your transfers to look for particular inventory movement details.
.png?width=670&height=363&name=image%20(15).png)
Transfer List Calendar View
If you switch the calendar toggle on the Transfers page you can see your transfers in a calendar view.
.png?width=670&height=363&name=image%20(16).png)
Accepting or Declining Transfers
When you receive a proposed inventory transfer you may accept or decline.
-
Navigate to the Transfers section of the dashboard or the Transfers screen under the Inventory section.
-
Click on the transfer description to open up the transfer detail screen for your review.
-
If you would like to accept the transfer, click “accept” in the “Actions” Column.
-
Note: Generally, we recommend that you only accept a transfer once you have received the physical inventory, as the system will consider you to have custody of and responsibility for those items.
-
-
Declining Transfers: If you would like to decline the transfer, click “Decline” in the “Actions” column. You will then be prompted to provide a reason for declining the transfer.
-
Admin Users may accept or decline a transfer on behalf of the recipient. If an Admin declines the transfer the transfer status immediately changed to Declined (bypassing the HOLD staus).
-
If a transfer is declined an email and an in-app notification will be sent to the Sender of the transfer.
-
-
You may also add comments to the transfer by clicking on the text bubble button in the “Actions” column. Type your comment and click “Add comment”.
.png?width=670&height=365&name=image%20(17).png)