In this article we’re going to discuss some creative ways you can use Bills of Materials to manage exceptions in your business. If you aren’t familiar with the Bills of Materials function of ConnectSx we suggest that you check out the basics in this article as well.
While typically a surgical tray has a standard configuration of devices it contains, we know that there are often exceptions, such as when surgeon preferences lead you to ship a different configuration for cases done by that surgeon. We know how much the relationships with your surgeons matter and that often manufacturers will bend over backwards to make sure the surgeon has what they need, but managing these custom trays can become difficult and unwieldy to manage - until now.
Fix Shortages/Overages to match the custom BOM
How to know how many containers can be built?
Filter your Containers according to BOM
Use the BOM to create a preference Card
How to Create a BOM
Simply create a Bill of Materials for each container configuration that you need to manage.
-
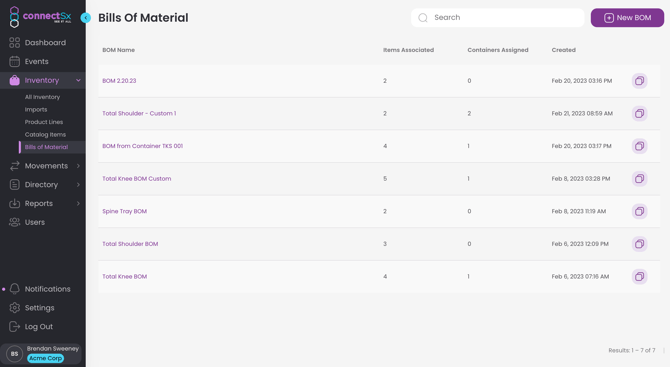
Navigate to the Inventory → Bills of Materials page of the Console
-
Click “New BOM”
-
Enter the name of the BOM
-
Select the devices that should be in that container and update the quantities that are required to be in the container.

-
You may enter a Min/Max quantity for each item which function as guidelines for your users. The only systematically mandatory quantity field is the Required quantity, which is also what the system will reference when stocking a tray up to the BOM required levels.
-
Click “Save”
Assign the BOM to a Container
Then all you have to do is assign the appropriate BOM to the container that will be shipped out by accessing the container’s detail screen. You can even apply a Tag to the container such as “Dr. Sweeney Custom Set” to be able to easily search and keep track of which containers are formatted to that BOM configuration.
-2.webp?width=670&height=338&name=image%20(4)-2.webp)
Fix the shortages/overages to match the custom BOM
Now we’ll need to get the container stocked according to the custom BOM so the set will be ready for that surgeon.
-
Navigate to the Container’s detail screen
-
If you haven’t already, make sure the correct BOM is assigned to the container
-
Scroll down to the Bill of Materials section
-
Utilize the Fix Shortages/Overages or the Auto-Refill functions to bring the container’s contents into spec. To learn more about using these features, check out this article.
-1.webp?width=670&height=393&name=image%20(5)-1.webp)
What happens when the set comes back in and need to be configured differently? Just switch out the BOM assigned to that container with the new one and change the TAG - then you’ll be able to quickly see which devices need to be added or removed based on the “Shortage”, “Complete”, or “Excess” flags.
-1.webp?width=670&height=399&name=image%20(6)-1.webp)
How many containers can be built?
Previously you had to do some math to figure out how many containers you could possibly create with a fully completed BOM, given your current stock. However, with the release of v4.2.0 you won’t need to lift a finger. Directly in the Bill of Materials screen you can see, by item or in total, how many fully stocked containers you could build given the current BOM and your current stock.
-1.webp?width=670&height=414&name=image%20(7)-1.webp)
Filter your Containers by BOM
Once you’ve created your BOM, you can filter containers by which BOM they have assigned to see how many and which containers are associated with that BOM.
-1.webp?width=670&height=370&name=image%20(8)-1.webp)